Thursday, December 16, 2010

Wearing This Tonight. Necklace With 1930's Glass Vintage Beads, Sterling Silver


Tonight I am going to see the Seattle Symphony perform Handel's Messiah.


This is one of my absolute favorite pieces of seasonal music and I have never attended a live performance. I'm really looking forward to it.


What makes it even better is that I am attending with my daughter Emma, who, having performed with the Seattle Symphony a few years ago, is now reviewing the Symphony's performance for Seattle's Teen Arts program, Teen Tix. This is a wonderful program that provides discounted arts tickets to Seattle teens. Emma has been one of their arts reviewers for a few years now.


It will be fun to get dressed up since I don't do that very often. I will be wearing one of my own designs, this necklace, which is a cascade of silvered amethyst bugle beads, a bit more purple than my photos captured. These beads were purchased in Paris and are Czech in origin, made in the 1930's. They came to me with individual looped wires through each bead. I created 10 strands of linked beads, each strand with 36 beads and finished the necklace with sterling silver findings. So, 360 linkages to make, and then check again for quality control. It took a while, but it was worth it, I think. I love the subtle silvery shimmer of the bugle beads in the light.


Tuesday, December 14, 2010

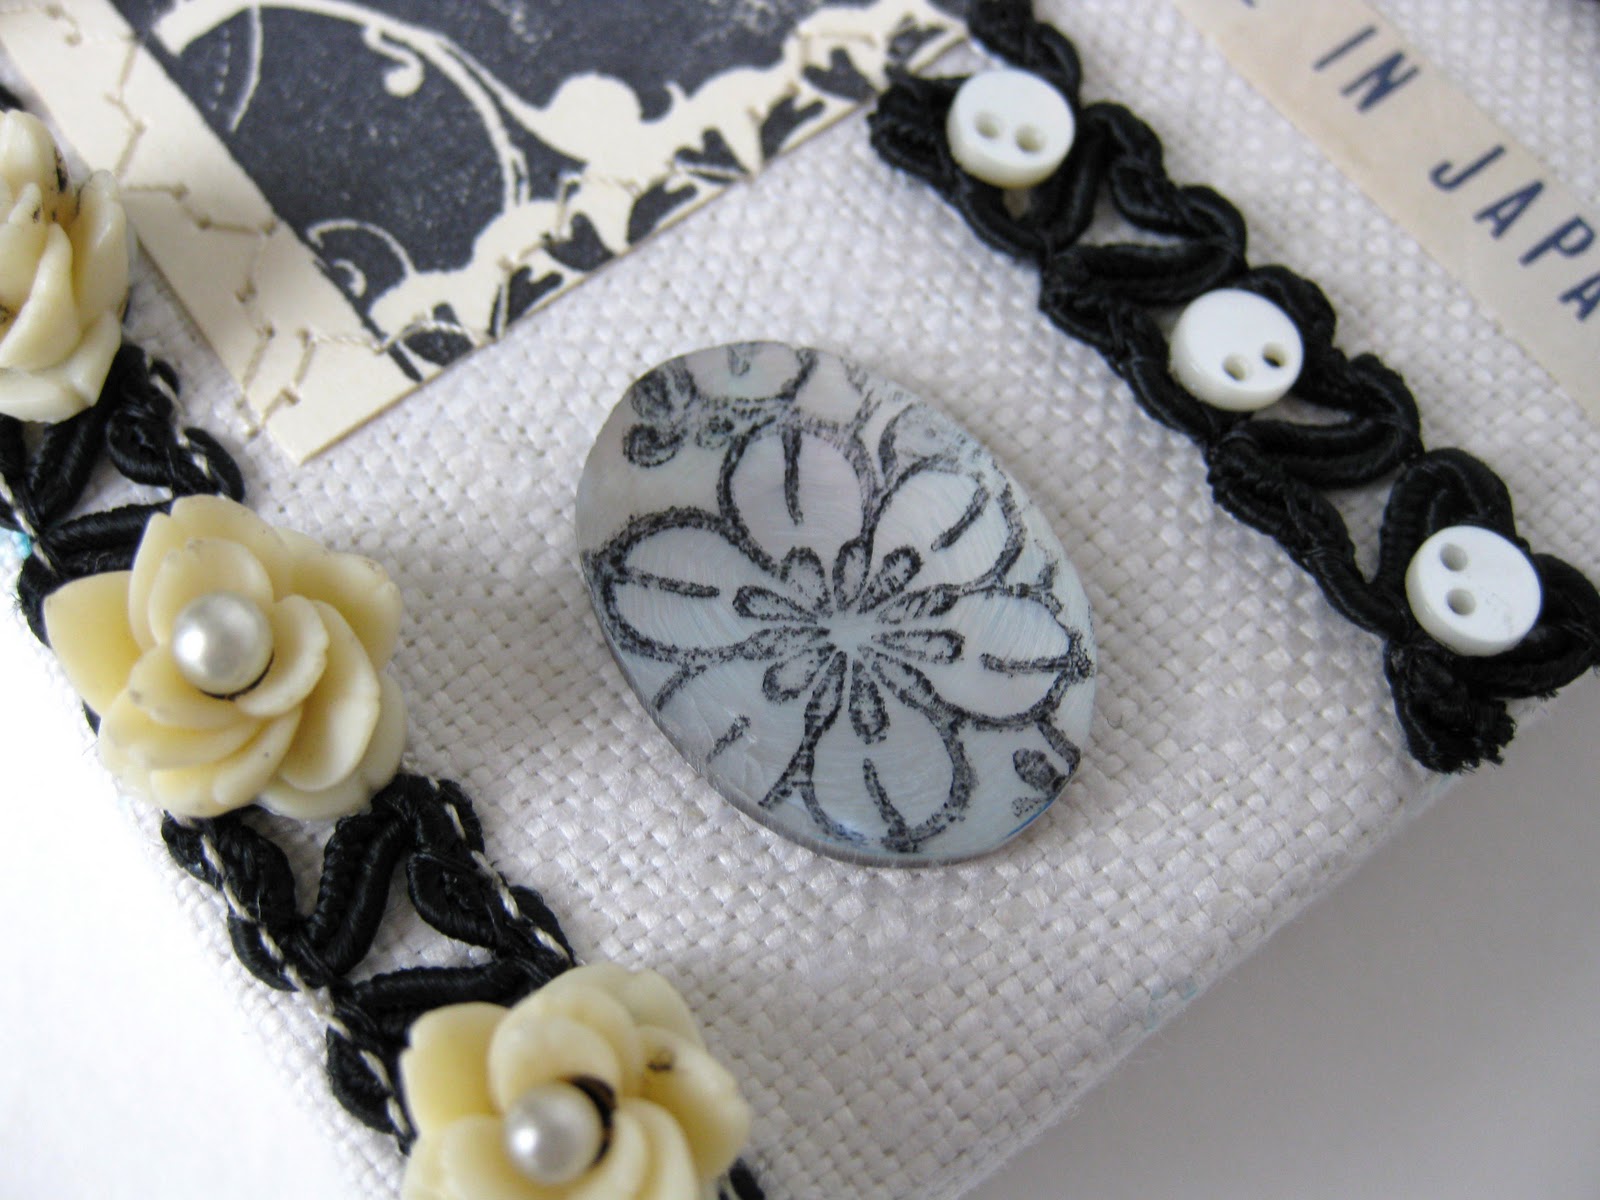
Vintage Design Inspiration Board #10 with Creativity Quote


Cherish that which is within you.
~Chang-tzu


Inspiration Board #10 features:

vintage fabric rose leaves (Japan)
vintage glass pearl drop (Japan)
vintage jet beaded ball (Japan)
vintage mother of pearl sequins (Japan)
vintage mother of pearl oval discs (USA), hand stamped
vintage ivory flower cabochons (Japan)
vintage pearl headpins (in flowers, Japan)
vintage hematite rhinestones (West Germany)
vintage braided trim (USA)
vintage Made in Japan paper tag (Japan)
vintage tiny pearl cabochons
antique silk embroidery floss
contemporary stamped shipping tag
vintage linen tea towel, hand stamped
mounted on 4x4 inch gallery wrapped canvas base

With special thanks to JoAnn Ouellet of Au Naturelle,
from whom I purchased the stamped shipping tag


Monday, December 13, 2010

Monday in Seattle. Handmade Star Ornaments With Vintage Cabochons

glittered stars, embellished with antique Czech glass cabochons

Begin doing what you want to do now...
We have only this moment, sparkling like a star in our hand
and melting like a snowflake...
~Francis Bacon Sr.

Friday, December 10, 2010

New at Bumbershoot Designs. Limited Edition Flower Bracelets


I love to make bracelets.
I'm especially happy that I was able to locate a few more flower beads to remake 2 of my favorite designs in time for the holidays.  Above is Lilac Pansies and below is Sky at Alki.  Both are available at Bumbershoot Designs.


Just one each of these bracelets, and then the beads are all gone...


I also have added this new, limited edition design, Fleur, to Bumbershoot Designs. It combines some of my favorites, vintage flowers and vintage glass pearls, with a detailed fleur de lis stamping that I have curved to fit the wrist, so light and comfortable to wear.

All of them reminders of spring as we approach the depths of winter
and the shortest day of the year.


New at Bumbershoot Supplies. Vintage Ribbon, Vintage Cabochons, Vintage Rhinestones and More


Are you busy right now?
I know we are!
So it's a short post today, just a few photos of some of the new and beautiful items we have in stock at Bumbershoot Supplies.  We have 3 vintage 1940's moire rayon ribbons just arrived, the one above is the color of Santa's coat.  Below is this lovely burgundy and we also have a deep pink. These are gorgeous soft, supple ribbons, the kind that make you sigh when you pull a length off the spool.  Made by Balley in the 1940's, here in the US.


I am looking at a box of vintage trims that just arrived today, so you can expect to see additional trims, laces and ribbons added to Bumbershoot Supplies over the next week or two, as long as the Seattle weather permits natural light photography :)

I am also looking at a box full of vintage rhinestones, cabochons and glass pearls that are hoping for new homes, and while they are waiting their turn to debut at Bumbershoot Supplies, here are a few that are currently available...


If we can be of any assistance in your holiday projects, please let us know.
We'll be happy to help out in any way we can.
We are shipping daily (except Sundays) through and including Dec 23.
Until next time, wishing you a great weekend!

Tuesday, December 7, 2010

Holiday Traditions. The Star Game


Every year our family plays a special holiday game beginning on US Thanksgiving and continuing until Christmas Eve. We call it "The Star". Whoever has "the Star" has to secretly do something special for another person in the family. It could be a chore, like emptying the dishwasher, taking out garbage, making a bed. It could be leaving a little trinket where someone will find it. The trinket could be anything, from a paper snowflake to a satsuma or a holiday cookie.  It could be leaving a few inspirational words, a snippet of poetry, a lovely photo. It is supposed to be something that the recipient will enjoy, something that will brighten their day a little bit.  And, importantly, this is all done secretly - you never tell the recipient it was you, and you leave the Star in sight so the recipient knows it is their turn to "have the Star" and pass it on.


We have played this game for many years now, since our children were quite small.  Then, they required parental assistance to play. Now they are both teenagers and the game has evolved with them.  On Christmas Eve, over dinner, we talk about what we particularly enjoyed about "the Star" during the past month.

So far this year, I have received a lovely cut paper snowflake, the origami crane shown in these photos, and today when I came home from the post office, there were jewel toned lights all around the window in my studio.

The Star itself is a little battered and worn, and has had repeated coats of paint and glitter. But it has served our family well over the years, and for all its worn appearance, it is an important symbol of our love for each other.

Friday, December 3, 2010

New at Bumbershoot Designs. New Designs With Vintage Pearls and Vintage Rhinestones


I've been busy in both Bumbershoot Supplies and Bumbershoot Designs, ensuring the shops are stocked and ready for the holidays! At Bumbershoot Designs, I've been able to offer several new designs, with more to come over the weekend.

Above is Margo, with fabulous ivory glass pearls from 1950's Japan.

Below is Dragonfly Pearl, a necklace to match my Dragonfly Pearl earrings...


There are a couple more new earring designs, including these vintage crystal rhinestone earrings, with rhinestones from occupied Germany, 1945 to 1949...


And these brass and flower earrings, featuring vintage brass floral stencil dangles, with delicate pink flowers from 1950's Japan...


Everything you see here can be found at Bumbershoot Designs. 
Until next time, wishing you a great weekend!

New at Bumbershoot Supplies. 23 New Vintage Beads, Cabochons, Settings, and More Since November 15


Since our November 15 newsletter, we have added 26 new items and restocked 2 at Bumbershoot Supplies, including these lovely "real gold" vintage mercury beads from Japan.

Jim and I are busy putting the final touches on our web site, http://www.bumbershootsupplies.com/ to enable shopping for our vintage supplies directly. To preserve our time for that activity, today I'll just show a few of our...

new settings...
Antiqued Brass Ox Octagon Rhinestone Setting, Vintage Style Pronged 10x8mm, 1 Ring set0054 (8)
Antiqued Brass Ox Oval Rhinestone Setting, Vintage Style Pronged 10x8mm, 2 Ring set0058 (8)
Antiqued Brass Ox Octagon Rhinestone Setting, Vintage Style Pronged 18x13mm, 2 Ring set0057 (4)

new cabochons…
Vintage Glass Cabochon. Peridot Green Fan, Frosted, Preciosa Czech, 29x21mm gcb0311 (1)
Vintage Glass Cabochon. Rosaline Leaves Floral Foiled 10x6mm gcb0302 (8)
Vintage Flower Cabochons. Roses Carved Mother of Pearl Ivory, 12mm mop0063 (4)

more new pretty glass…
Vintage Glass Flower Pendant. Jade Green Carved Floral, 35x21mm Japan, gcb0312 (1)
Vintage Glass Rhinestone Jewel. Navette Ruby Sapphire 15x7mm rhs0109 (6)
Vintage Glass Beads, Gold Mercury Rounds 4mm Japan vgb0244 (24)
I invite you to come on over to Bumbershoot Supplies and have a look at all these new vintage treasures. 
Until next time, wishing you a great weekend!

Wednesday, December 1, 2010

Tutorial: How to Set Vintage Rhinestones in Pronged Settings


Here are some basic tips for setting a pointed back rhinestone into a pronged setting.  We offer many vintage rhinestones and antiqued brass prong settings at Bumbershoot Supplies, and it is so satisfying and fun to set these vintage jewels and quickly create dangles, earrings, pendants, embellishments for jewelry and mixed media art.

You will need:

pointed back rhinestones
pronged settings to fit the rhinestones, with open or closed backs
wide flat nosed pliers

And perhaps: pointed flat note pliers, wire cutters (to address mistakes, see below)
There are also special prong setting tools, but I can’t speak about those since I don’t own one. I use the pliers shown.


1) Place the stone so it is sitting level in the setting. Ideally the edge of the stone will be just above the top of the setting. This sounds straightforward, but it is not always easy to fit vintage rhinestones into contemporary settings, even when both are supposedly the same size. You may need to open the prongs a bit, bending them gently out and away from the center of the setting. See tips section below for more on this process.


2) Firmly hold the stone in place with your thumb and index finger of your nondominant hand. Depending on the size of the stone and your thumb, yes, the prongs will stick into your finger a bit. Hold the stone in the middle so it stays balanced in the setting.


3) While continuing to hold the stone firmly, push down each prong with the wide flat nosed pliers. It is important to hold the stone firmly so it doesn’t slide or move around while you are setting it. I like to get each of the prongs (often 4 total) down and then go around again to tighten them.

Some Additional Tips:

1) Be careful if working with open backed settings so the back side of your pliers does not scratch the back of your stone.

2) Sometimes to fit a vintage rhinestone into a setting, you may need to open the prongs a bit, bending them gently out and away from the center of the setting. It’s sort of like hyper extending the prong. If you need to do this, go slowly and gently. Open all 4 prongs just a bit, see how the stone fits, then repeat. You want to manipulate the prongs as little as possible so they don’t weaken. You may even have to do this with rhinestones that come from the same lot – one may fit the settings just fine, the other may require more manipulation.

3) Don’t press too hard on the prongs first time around. You can chip and even break stones by pressing too hard, not that I would know anything about this personally, of course… :)


4) Try pushing prongs down on the diagonal. Often there are 4 prongs in a setting. Start pushing down one prong, then do the one diagonally opposite it, then finish with the last 2 prongs. This can help hold the stone level in the setting.

5) With practice, you will find the motion to push those prongs down. It’s sort of a rolling motion, with the pliers positioned towards the base of the prong, and the movement is pressing forward and down.

6) When you are learning to set stones, and even when you have been setting them for years, settings can get scratched, stones can slip and sit crookedly in settings and so on. In these circumstances, you may want to start over and reset your rhinestone in a new setting. I am told that a special prong setting and lifting tool works for lifting prongs up so you can reposition the stone to reset it. But like I said, I don't have one of those tools, so here is what I do: Sometimes I use a pair of narrow, pointed flat nosed pliers to lift the prongs enough to remove the stone and start again. Sometimes I actually use wire cutters to clip the prongs at the base where the prong attaches to the setting, in order to remove the prongs so I can get the stone out. I use just the tip of the cutters and go slowly so as not to scratch or cut the stone. My default is always “save the stone”. The reason I often decide to sacrifice the setting when my stone goes in crooked is because with repeated opening and closing, the prongs weaken and can snap. If you are repairing or replacing stones in a piece of costume jewelry, of course you must work with the existing setting. Otherwise it’s your decision: you can try to reuse the setting, or you can sacrifice it and start anew.

7) When you are learning, expect to lose a few settings and stones. There is nothing like practice to improve your ability to set all shapes and sizes of rhinestones in all kinds of settings. But no matter your level of experience, you will occasionally scratch settings, chip stones, have to reset stones, and so on. Be sure to have enough patience and supplies on hand to account for these occurrences.


8) If I want to be particularly careful when setting a stone, I use a small piece of quilting cotton and press the prongs down using the cotton as a barrier between my pliers and the setting. This takes a bit of practice, since you can’t see the setting as well, but it can decrease the chance of scratches to the setting and to the back of the stone if you are using open backed settings.

When I was teaching my daughter Emma to do this:

1) We started with octagon stones in the 10x8mm size. The octagons are essentially rectangles with rounded corners and they give the eye a direction for where the prongs ought to go. Plus you are pressing a straight edge (the prong) against another straight edge (the stone). Emma also found this size to fit easily with her thumbs and fingers.

2) It may be counter intuitive, but I taught Emma using the more expensive stones – she actually learned on vintage machine cut Swarovski crystal stones, such as the green turmaline shown above. This is because these stones are so precisely cut that they fit really well into contemporary settings, unlike many other vintage rhinestones that are more roughly molded and may require some finesse and patience to set.

3) One thing to consider is using raw brass settings for practice stone setting. I do not recommend using raw brass for most jewelry designs for various reasons (and that is the subject of another upcoming blog post) but raw brass settings are the least expensive to purchase and may be a good choice for practice – sometimes you can feel a bit better about gaining experience when it costs a bit less. If you don’t want to use raw brass settings in your jewelry, you can just plan on removing the stones from the settings after you’ve practiced with them.

We did have to throw away a few settings, but using stones and settings that fit well together, and using the octagon shape, Emma was setting stones in no time – literally within minutes.

And if you want something even easier, at Bumbershoot Supplies, you will find a small number of glue-in settings designed specifically for larger pear and oval pointed back rhinestones. If you choose to glue-in instead, there is a tips for gluing tutorial on my blog, here.

Many thanks to Emma for serving as demonstrator for this post!
And here is what we did with these rhinestones: